As you may already know, Spec2 is the new version of the UI framework: Spec. Spec2 is not just a new version but a complete rewrite and redesign of Spec1. Contrary to Spec1, in Spec2 all the layouts are dynamic. It means that you can change on the fly the elements displayed. It is a radical improvement from Spec1 where most of the layout were static and building dynamic widgets was cumbersome.
In this post we will show that presenters can be dynamically composed using layouts. We will show a little interactive section. Then we will build a little code editor with dynamic aspects. Note that In this post, we are going to use simply Spec, to refer to Spec2 when we do not need to stress a difference.
Layouts as simple as objects
Building dynamic applications using Spec is simple. In fact, any layout in Spec is dynamic and composable. For example, let me show you the following code snippet:
"Instantiate a new presenter"
presenter := SpPresenter new.
"Optionally, define an application for the presenter"
presenter application: SpApplication new.
There are three principal layouts in Spec: SpPanedLayout, SpBoxLayout and SpGridLayout. For this presenter we will use the SpPanedLayout, which can receive two presenters (or layouts) and places them in one half of the window.
presenter layout: SpPanedLayout newTopToBottom.
presenter openWithSpec.
Of course, we are going to see an empty window because we did not put anything in the layout.
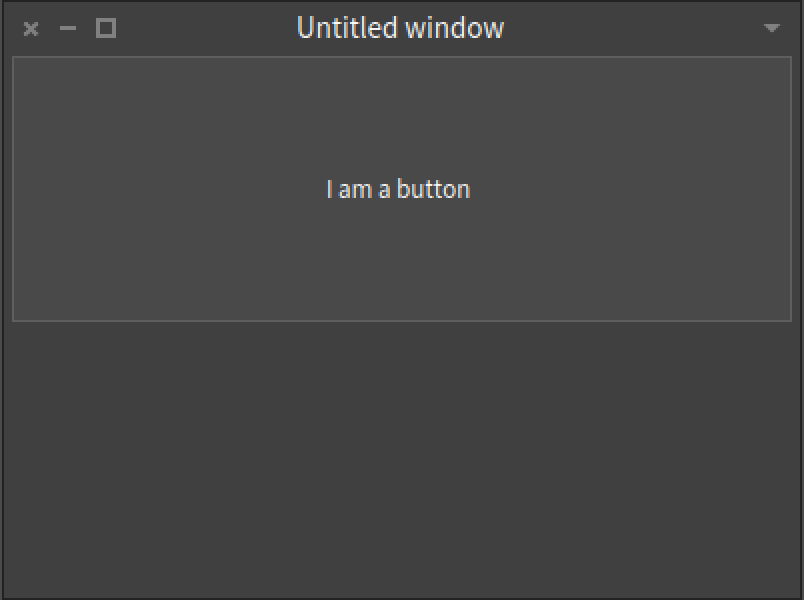
Now, without closing the window, we can dynamically edit the layout of the main presenter. We will add a button presenter executing the following lines:
presenter layout add: (button1 := presenter newButton).
button1 label: 'I am a button'.
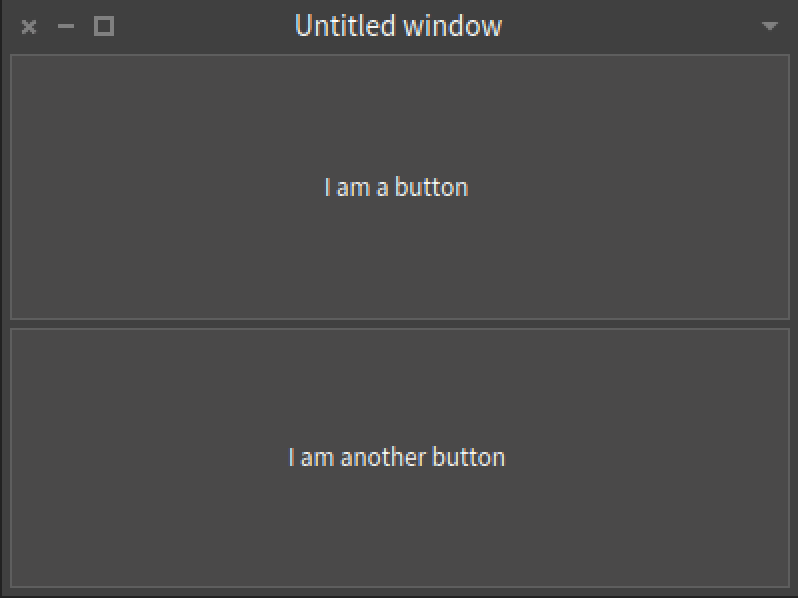
Now, we can add another button. There is no need to close and reopen the window, everything updates dynamically and without the need of rebuilding the window. As we instantiate the layout with newTopToBottom, the presenters will align vertically.
presenter layout add: (button2 := presenter newButton).
button2 label: 'I am another button'.
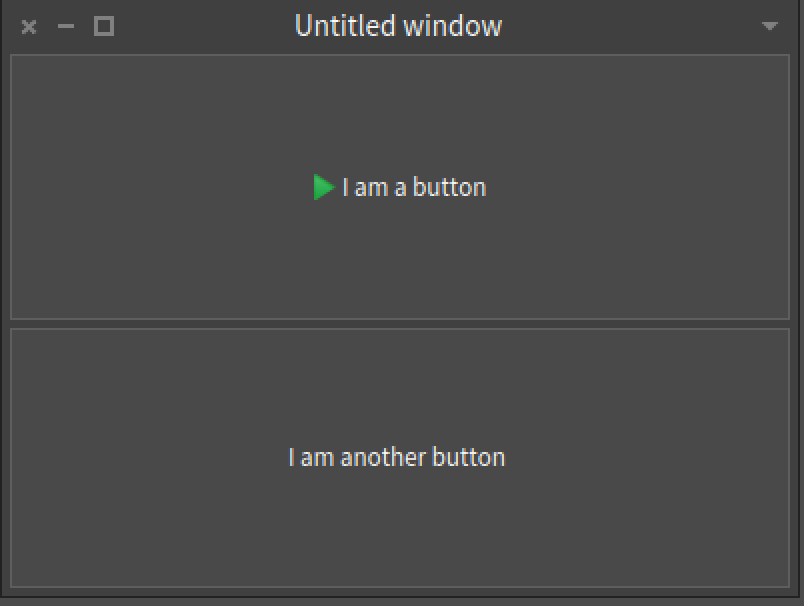
Now, we can put an icon for the first button:
button1 icon: (button1 iconNamed: #smallDoIt).
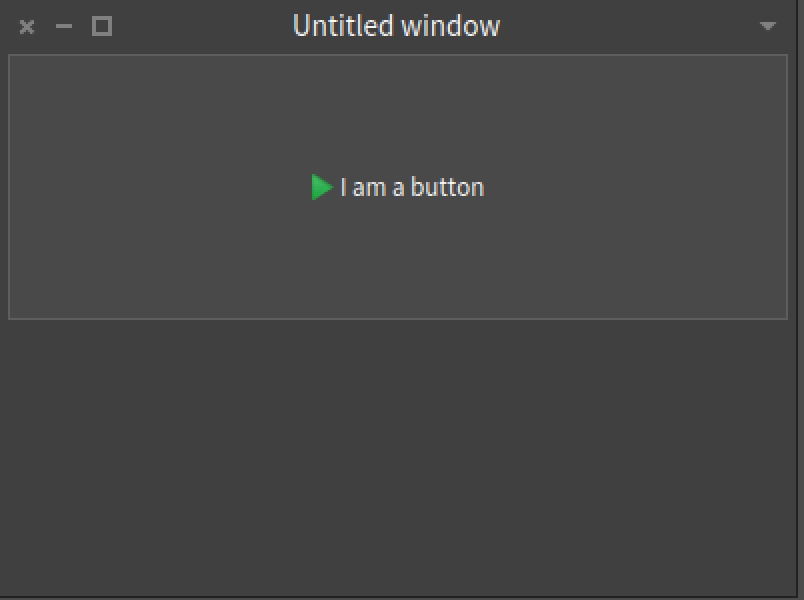
Or we can delete one of the buttons from the layout:
presenter layout remove: button2.
What we should see here is that all the changes happens simply by creating a new instance of a given layout and sending messages to it. It means that programs can create simply complex logic of the dynamic behavior of a widget.
Building a little dynamic browser
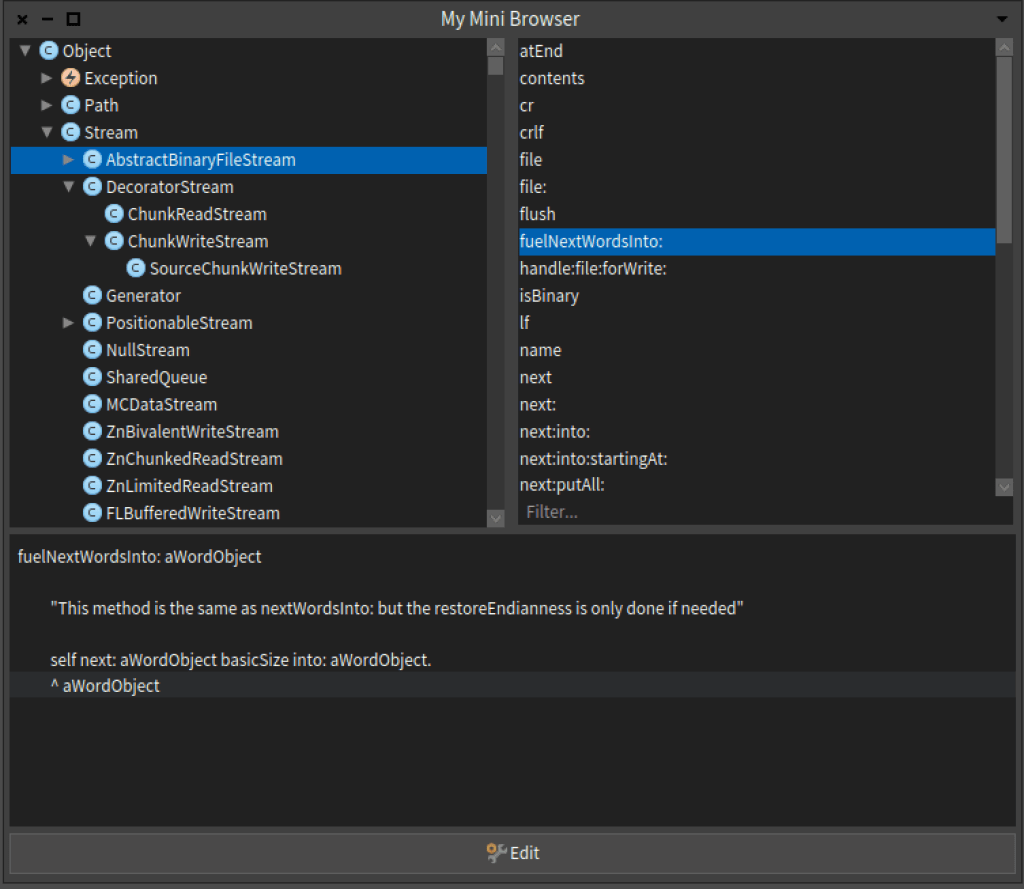
Now, with all of this knowledge, we are going to build a new mini version of the System Browser. We want to have
- A tree that shows all the system classes.
- A list that shows all methods in the selected class.
- A text presenter that show the code of a selected method and a button.
- Initially the code of the method will be in “Read-Only” mode. When we press the button, we are going to pass to “Edit” mode.
Let us get started. So, first, we need to create a subclass of SpPresenter, called MyMiniBrowserPresenter.
SpPresenter subclass: #MyMiniBrowserPresenter
	instanceVariableNames: 'treeClasses button codeShower methodsFilteringList'
	classVariableNames: ''
	package: 'MiniBrowser'
Now, we need to override the initializePresenters method in which we are going to initialize the presenters and the layout of our mini browser.
First we are going to instantiate the tree presenter. We want the tree presenter to show all the classes that are presented in the Pharo image. We know that all subclasses (almost) inherit from Object. So, that is going to be the only root of the tree. To get the subclasses of a class we can send the message subclasses, that is what we need to get the children of a node. We want to each of the nodes (clases) have a nice icon, we can get the icon of a class with the message systemIcon. Finally, we want to “activate” the presenter with only one click instead of two. The code will be:
MyMiniBrowserPresenter >> initializePresenters

    treeClasses := self newTree.
    treeClasses
	   activateOnSingleClick;
	   roots: Object asOrderedCollection;
	   children: [ :each | each subclasses ];
	   displayIcon: [ :each | each systemIcon ].
For the methods, we want to have a filtering list. That means, a list in which we can search of elements. Also, we want that to display only the selector of the method to the user and sort them in an ascending way.
    methodsFilteringList := self newFilteringList.
    methodsFilteringList display: [ :method | method selector ].
    methodsFilteringList listPresenter
	    sortingBlock: [ :method | method selector ] ascending.
We said that, initially, the code is going to be in “Read-Only” mode. So, the label of the button is going to be “Edit” so say that is we click on the button we will change to edition mode. Also we want to have a nice icon.
   button := self newButton.
   button
	  label: 'Edit';
	  icon: (self iconNamed: #smallConfiguration).
As the initial behaviour will be read-only mode, the code shower will be only a text presenter that is not editable.
   codeShower := self newText.
   codeShower beNotEditable.
And finally we want to intialize the layout of our presenter.
self initializeLayout
Here the complete code of the method is:
MyMiniBrowserPresenter >> initializePresenters

	treeClasses := self newTree.
	treeClasses
		activateOnSingleClick;
		roots: Object asOrderedCollection;
		children: [ :each | each subclasses ];
		displayIcon: [ :each | each systemIcon ].

	methodsFilteringList := self newFilteringList.
	methodsFilteringList display: [ :method | method selector ].
	methodsFilteringList listPresenter
		sortingBlock: [ :method | method selector ] ascending.

	button := self newButton.
	button
		label: 'Edit';
		icon: (self iconNamed: #smallConfiguration).

	codeShower := self newText.
	codeShower beNotEditable.

	self initializeLayout
Placing elements visually
We want in the upper part of the layout to have the classes and the methods shown in a horizontal way, like in the System Browser (a.k.a. Calypso). So, what we will do is to create another left to right layout, with an spacing of 10 pixels, the classes and the methods.
Then, we will add that layout to our main layout. the main layout is going to be a top to bottom layout. After, we want the code shower and then the button. We do not want the code to expand and also we want a separarion of 5 pixels for this layout.
MyMiniBrowserPresenter >> initializeLayout

	| classesAndMethodsLayout |
	classesAndMethodsLayout := SpBoxLayout newLeftToRight.
	classesAndMethodsLayout
		spacing: 10;
		add: treeClasses;
		add: methodsFilteringList.
	self layout: (SpBoxLayout newTopToBottom
		spacing: 5;
		add: classesAndMethodsLayout;
		add: codeShower;
		add: button expand: false;
		yourself)
So far, so good… but we did not add any behaviour to the presenters. To do that we can either do it in the initializePresenters method of override the connectPresenters method. To clearly separate the intention of the methods, we favor overriding connectPresenters.
Connecting the flow
When we click on a class of the tree, we want to update the items of the methods list with the methods of the selected class. When we click on a method, we want to update the text of the code shower with the source code of the method.
MyMiniBrowserPresenter >> connectPresenters

	treeClasses whenActivatedDo: [ :selection |
		methodsFilteringList items: selection selectedItem methods ].

	methodsFilteringList listPresenter
		whenSelectedDo: [ :selectedMethod |
			codeShower text: selectedMethod ast formattedCode ].

	button action: [ self buttonAction ]
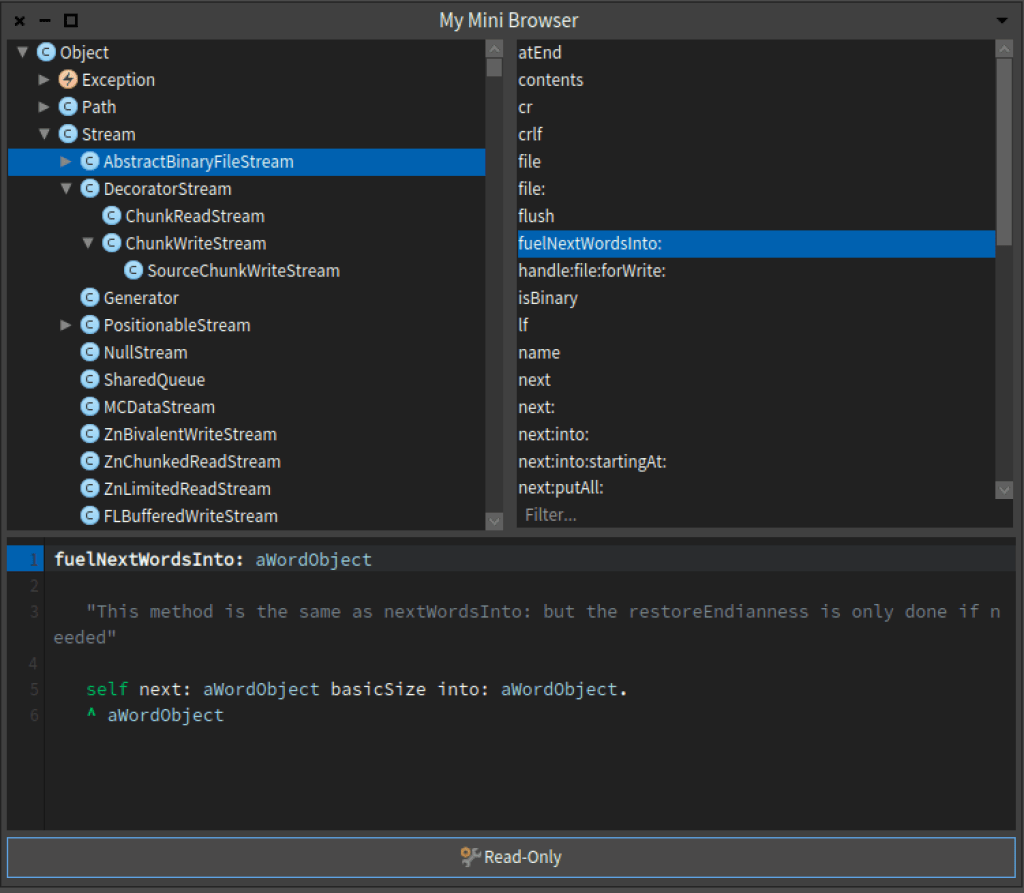
When we click on the button we want several things. That is why it is better to create a separated method. First, we want to change to label to the button to alternate between “Edit” and “Read-Only”. Then, we want to change the presenter of the code shower. If the Mini Browser is on read only mode we want to have a text presenter that is not editable. And if the Mini Browser is on edit mode we want to have a code presenter that highlights the code and show the number of lines of code. But always the code shower is going to have the same text (the code of the methods).
MyMiniBrowserPresenter >> buttonAction

	| newShower |
	button label = 'Edit'
		ifTrue: [
			button label: 'Read only'.
			newShower := self newCode ]
		ifFalse: [
			button label: 'Edit'.
			newShower := self newText beNotEditable ]

	newShower text: methodsFilteringList selectedItem ast formattedCode.

	self layout replace: codeShower with: newShower.
	codeShower := newShower
As a last detail, because we love details, we do not want the “Untitled window” as the window title and also we want a default extent. We override initializeWindow:method.
MyMiniBrowserPresenter >> initializeWindow: aWindowPresenter

	aWindowPresenter
		title: 'My Mini Browser';
		initialExtent: 750 @ 650
Voilà! We have a new version minimal version of the System Browser. If we run MyMiniBrowserPresenter new openWithSpec.
With Spec we can build from simple applications to very sophisticated ones. The dynamic properties are simply nice. Spec has lots of presenters that are ready to be used. Start digging into the code to see with presenters are available, what it is their API and start experimenting and playing! Layouts can be configured in multiple ways, so have a look at their classes and the example available.
Sebastian Jordan-Montano

Quick Question, once you’ve built your UI dynamically, adding, moving deleting objects and getting it just right, is there an easy way to “snapshot” that object structure so that you can generate the code to build it?
LikeLike
Hello Tony,
I don’t think is possible to ask the layout for its code. I made a quick search and I couldn’t find anything. Maybe you could try ask on the #spec channel on the Pharo Discord server.
LikeLike
This may be a duplicate, but… So once you have constructed your UI dynamically by adding, deleting, moving, styling a set of objects, is there a way to snapshot the structure so you can generate it using code?
LikeLike
I opened the default image and tried to do the code sequences in this article.
However, I encounter an error at:
presenter layout: SpPanedLayout newTopToBottom.
I must mention that I worked with Smalltalk in the past but not with Pharo.
I have just installed it and was hoping that I would evaluate the lines in a playground and I would get a taste of Spec2.
Please bear in mind in the future the importance of clearly defining the context in which the code should be run: maybe there is a certain image required, a certain package loaded, the code should be run in a certain tool etc.
It is very discouraging to be faced from the very beginning with an error that you have no chance to solve very soon.
LikeLike
Hello Paul, I’m just reading this. Could you explain more in detail your problem on the Pharo Discord channel, like that we can help you. Thanks
LikeLike
Thanks so much for this. I worked with Dolphin Smalltalk for some years, which is also MVP, so this was so helpful in sorting out what goes where.
Just a tiny housekeeping item: the Object definition for MyMiniBrowserPresenter currently reads:
SpPresenter subclass: #MyMiniBrowserPresenterinstanceVariableNames: 'treeClasses button codeShower methodsList'And it should probably read:
SpPresenter subclass: #MyMiniBrowserPresenterinstanceVariableNames: 'treeClasses button codeShower methodsFilteringList'Thanks again for this post and your blog in general!
LikeLike
Hello TScott, thanks for your comment! You are right. I’ll fix it.
Have a good day
LikeLike